Showing posts with label diy. Show all posts

Saturday, 25 October 2014

Handmade Rag Rugs

When I was a little girl, our summer cottage was down the red dirt lane from an elderly aunt's. I think it was that early in my life that I fell in love with old furniture and antique items.  Leota (Oat for short) was widowed at a  young age and was left fairly comfortably. Her home was decorated so differently than mine, most of her furnishings came from estate sales and antique stores.  It was at her home that I remember looking at the huge rag rug.  I was only about three years old, but I remember my mother having tea, and I was set on the rug to play with lace edged hankies and little cedar box with a hinged lid and a little brass lock.  I remember the hankies smelled of lavender and cedar.  I remember laying on my belly, with sunlight shining in the picture window, while I traced the fabrics that made up the  the colourful strips in the recycled wool braids and played with the lacy bits of linen.


I have attempted braided rugs but I have never made much headway.  I have, however, made several crocheted rugs of cotton sheeting.  Crocheted rugs are instant gratification.  I made this 3’ round rug for my bathroom on a lazy Saturday, just before the new year. 
My rugs are made of cotton or poly-cotton sheets.  I keep a lookout for them at yard sales, or second hand stores. I don’t worry about patterns because they are not seen, it’s the colours and colour combinations that are important.
Rag rugs look great in any room, they wash fine.  The little ones will wash in the washing machine, the bigger rugs, I soak in the tub, scrub them with a little hand brush and let dry in the sun.  The older they get the more I like them, it is as though their colours wash out a bit, and they blend easily with my old furniture. 
Eren at Vintage Chica has a great tutorial on how to make your own rag rug.

Homemade Bread- Yum


I love homemade bread, I love the taste, the smell, and the feel of the dough when I handle it.  I have always made my own bread, but over the past year or two, I have made an effort the number of times that I have actually purchased bread or rolls from the store. It is my gift to my family to provide them with wholesome bread, free of preservatives.  I usually make a rather dense loaf filled with whole grains, or oatmeal, honey or molasses. 
This year I have been very lucky to teach the craft of bread making to several classes of high school students, I get raving reviews from their parents and friends about the confidence they have baking from scratch.  Here is the recipe that I use.


Ms. Hatheway’s Basic Bread Recipe


3 cups warm Liquid
1 Tablespoon Salt
4 Tablespoons Fat
1 Tablespoon Yeast
1 Tablespoon Sugar
5 cups Flour


Notes:
3 Cups warm liquid  (water is fine, I sometimes use milk, whey  or yogurt milk mix… left  over potato water works great) heat on stove to a temp hot to the touch
1 T salt

4 T of fat ( I usually use butter , but vegetable oil, olive oil,  shortening or lard will do fine) make sure the water is warm enough to melt the hard fat
note*****(If you are adding cereal, ie.  Red River Cereal, Oatmeal or Cornmeal, add 1 more Cup hot water even left over potatoes, squash or pumpkin)

Let mixture cool to warm to the touch,  then add,
1 T yeast (If I am in a hurry, I add 2, if it is raising over night, only 1 Tablespoon is enough)

1 T Sugar****note: if you are making brown bread, add 1/3 cups of molasses at this stage instead of the sugar
Let set for about five minutes to a foam.
Add 3 Cups of flour (All purpose flour for a white loaf, or multi-grain, whole wheat, or rye flour if making a heartier grain.)
For the remainder, about 2 more cups of All Purpose Flour, knead in to the softer mixture.  The dough should be kneaded for about 5 minutes, until the gluten strands are elastic and stretchy.

Add any dried fruit or nuts, herbs like rosemary or roasted garlic cloves  (up to 1/2 cup) at this time.

Let rise in a bowl covered with a dishcloth.

When dough is double the size, punch down and form into loaves.

Let rise again…

Bake 350 degrees about 45 minutes for a loaf until there is a hollow sound when you tap on it.


Sticky Buns

Make a Smudge

Melt 1/2 cup of margarine, add ¾ c brown sugar and spread in the bottom of a 10 x 13 pan. 

Roll bread dough into a large rectangle, add ¼ c softened margarine and ½ c brown sugar, sprinkle liberally with cinnamon ( optional ½ c walnuts or pecans)

Roll mixture into a large roll, cut into equal parts place in pan (about a dozen rolls to a pan)

Let rise.

Bake at 350 degrees for 50 minutes

Turn out onto a parchment lined sheet as soon as they are out of the oven. (Don’t leave in the pan, they will stick.)


Other Bread Dough Ideas

Braided Loaf

Roll loaf in poppy seed, or oatmeal for a more rustic looking loaf

Rolls

Breadsticks (add garlic salt, sea salt, oregano,  or parmesan)

Pretzels (form, poach in salt water and bake on baking sheet)

Roll flat and fry in a dry frying pan as a tortilla

Roll and cut into squares or doughnut cutter, fry in lard, and sprinkle with icing sugar

Pizza crust

Roll and fill with pizza fillings bake

 Sticky Buns / pesto rolls


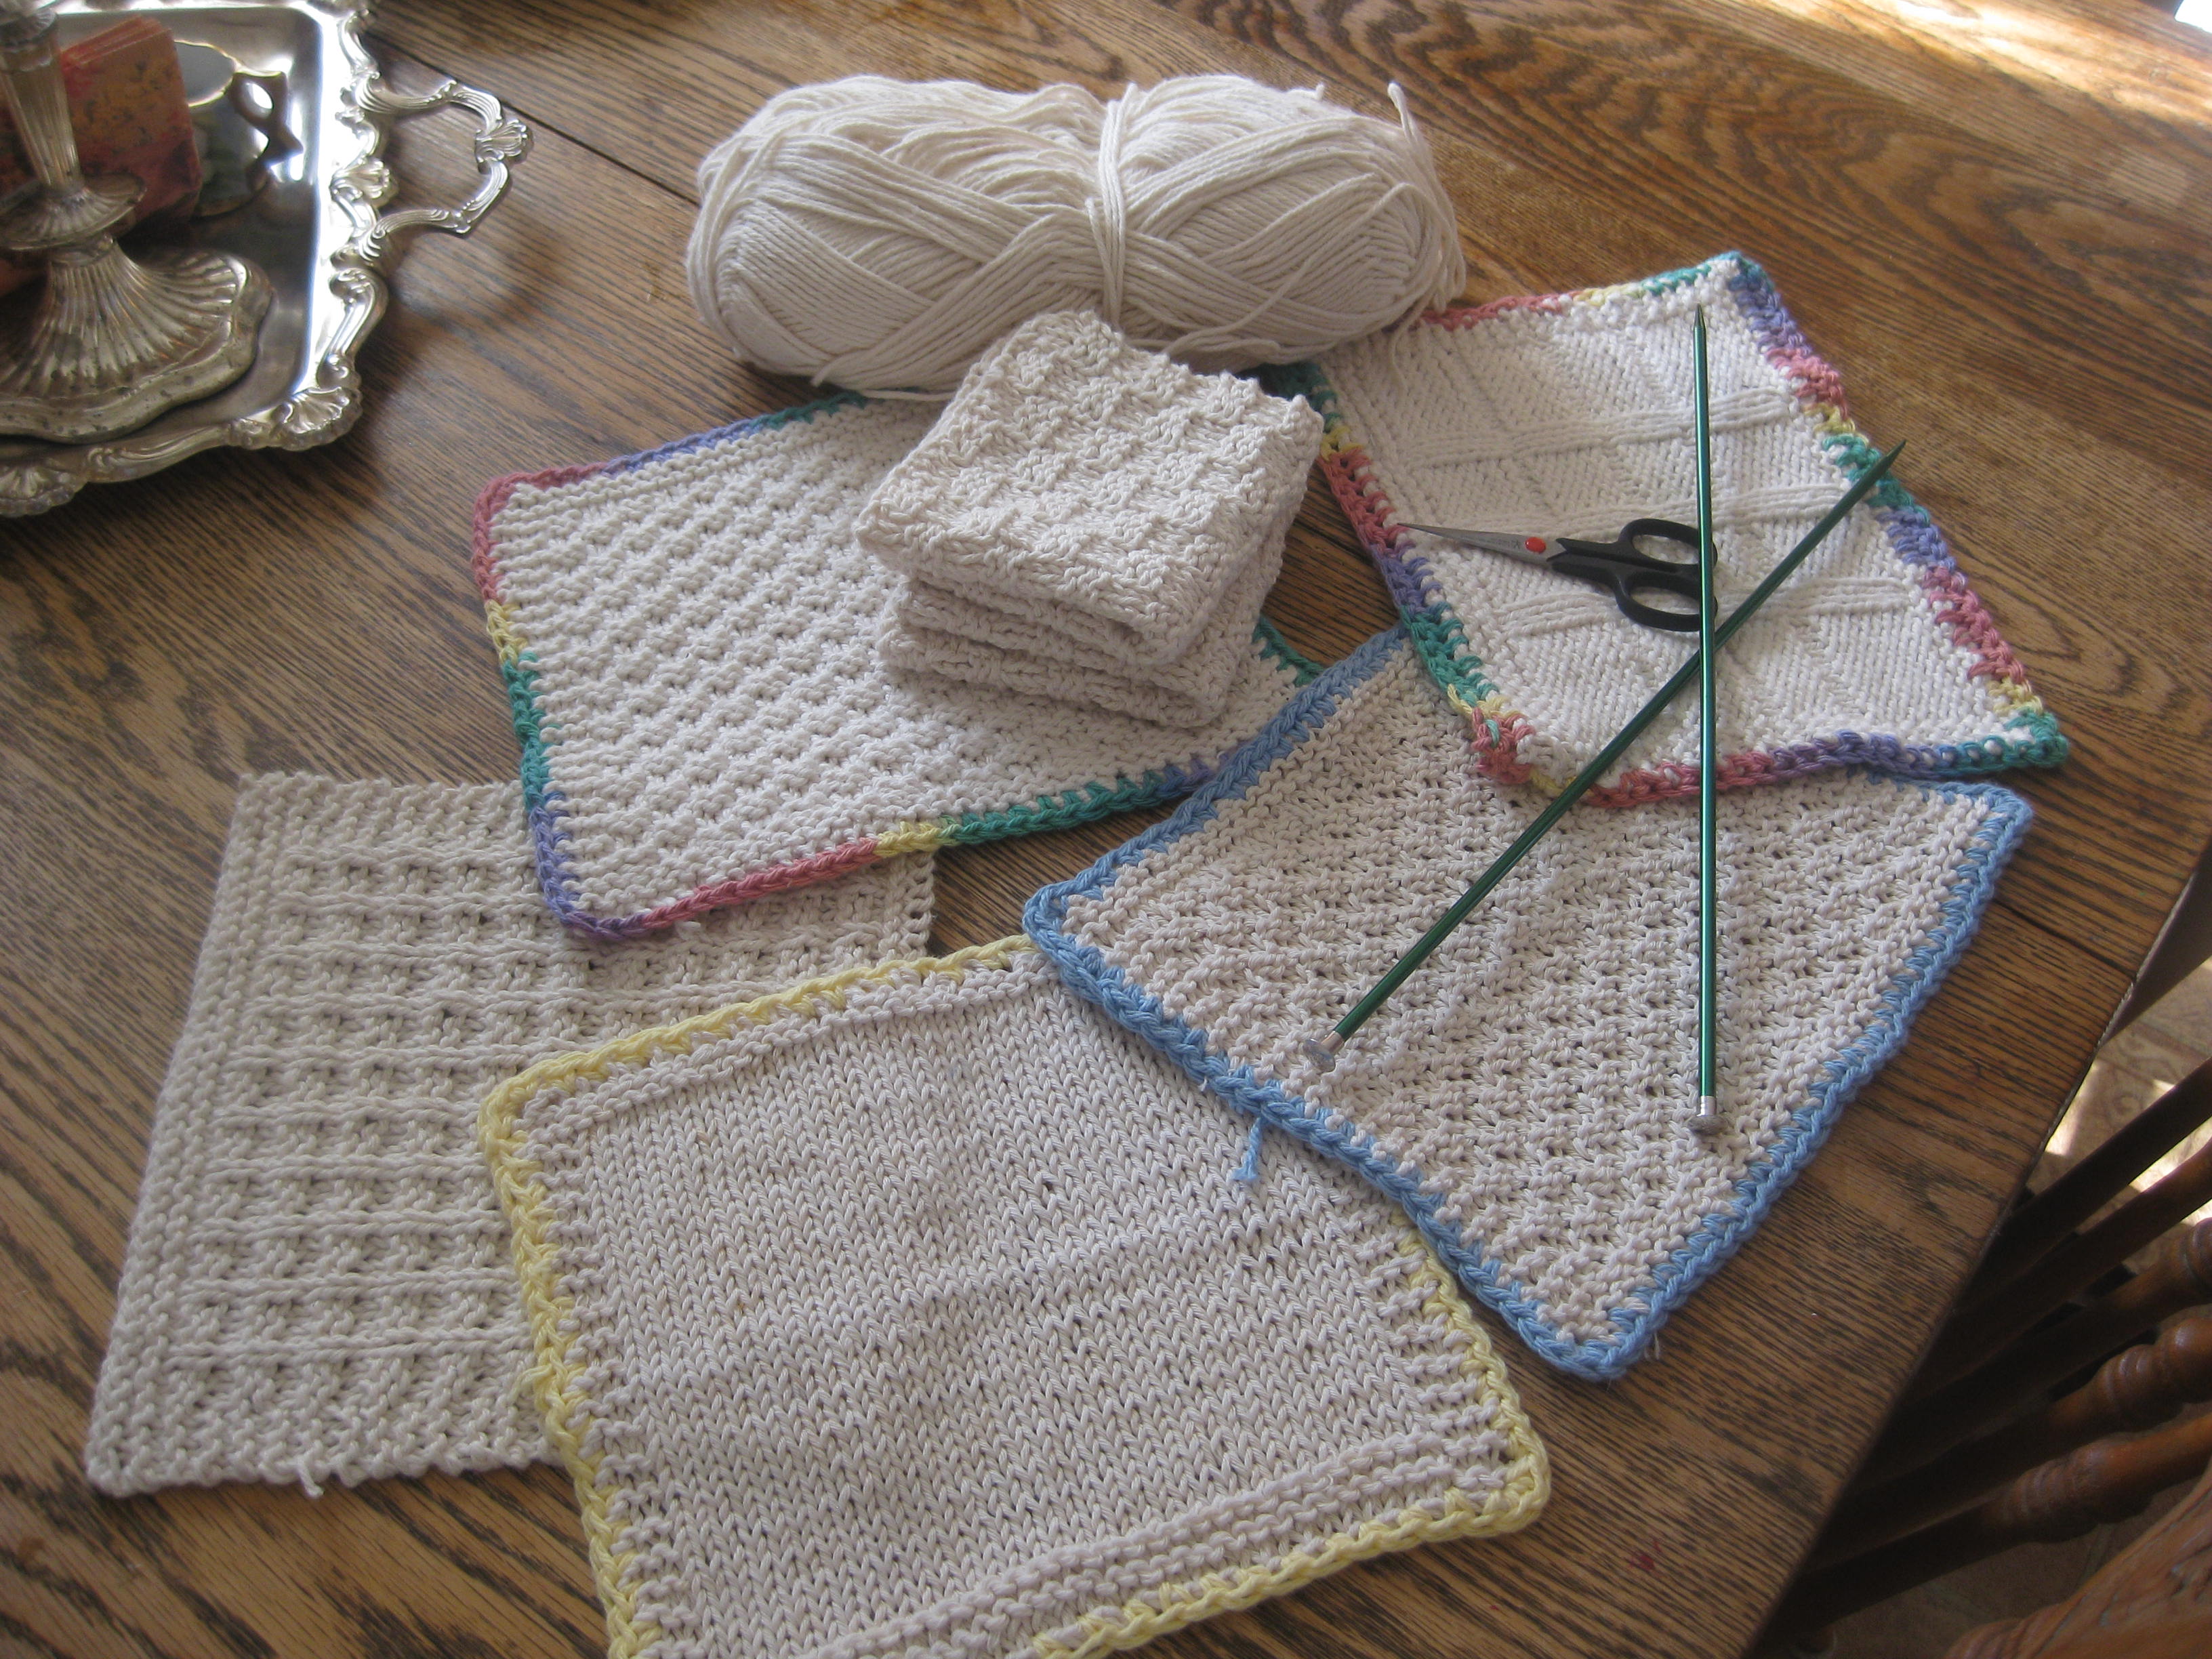
Knitted Dishcloths


My grandfather taught me to knit with wooden sucker sticks.  I think I was about three.  Since that time I have always been a knitter, not a fancy knitter, but a knitter nonetheless.  I tend like little simple projects; hats, mittens, socks, shawls, and dishcloths. I think always want to move on to the next project so instant gratification of small projects is good.


Right now, I am knitting a stack of dishcloths.  They are the perfect project to take with me or pick up in the evening. I make all of my cloths in an off white cotton, and vary the patterns.  Sometimes I add a bit of colour as a border, but I find that the white is easily cleaned, and I like the look of the uniform cream where the coloured dishcloths tend to fade.